HOW WE MAKE AN OCULAR PROSTHESIS

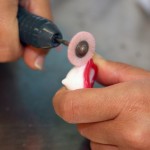
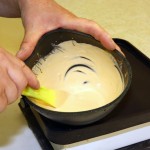
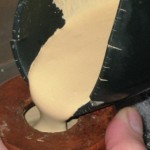
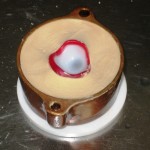
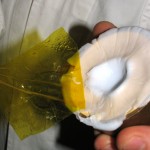
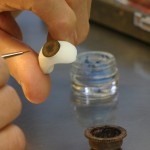
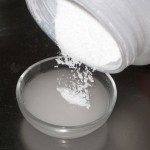
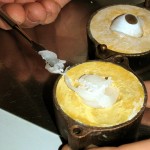
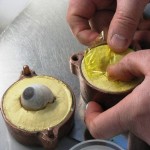
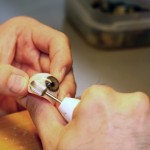
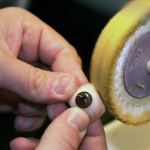
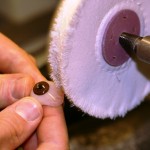
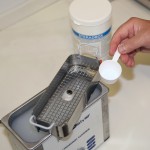
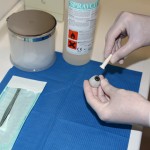
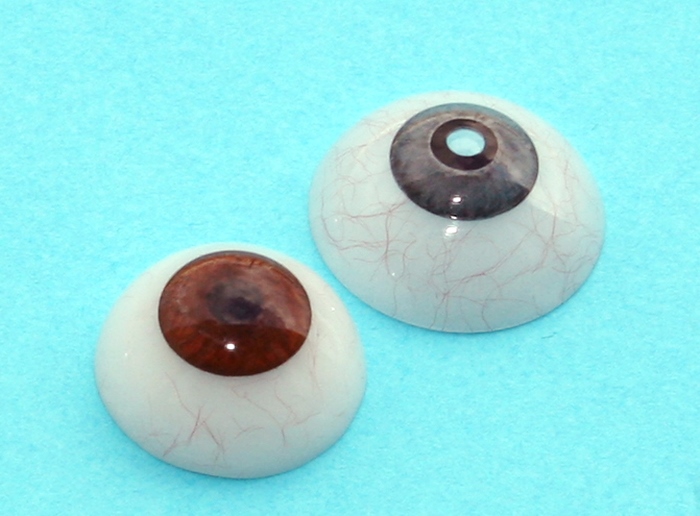
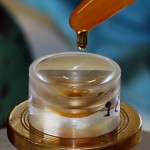
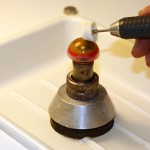
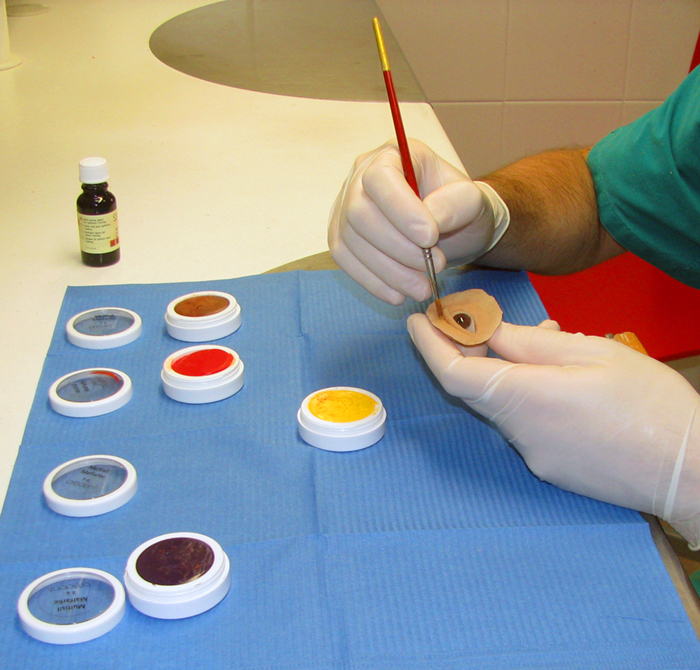
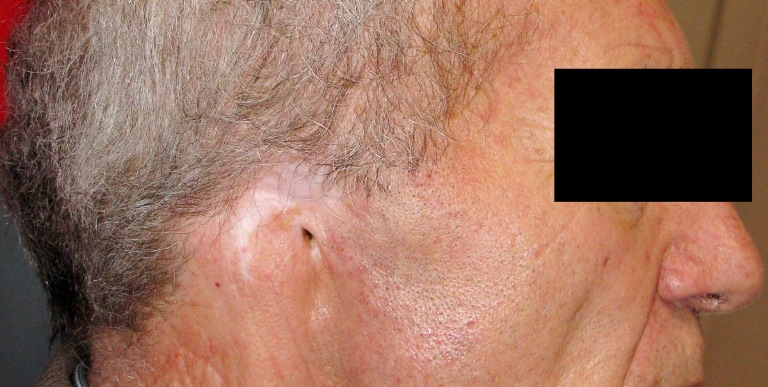
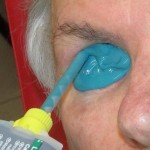
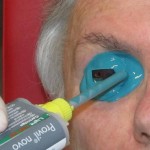
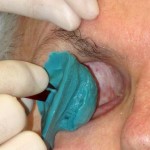
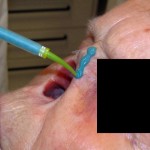
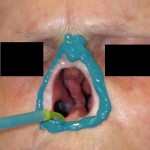
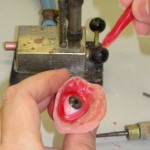
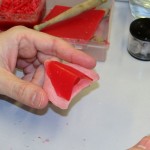
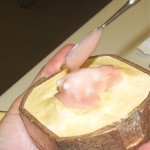
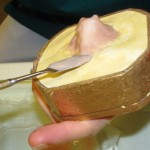
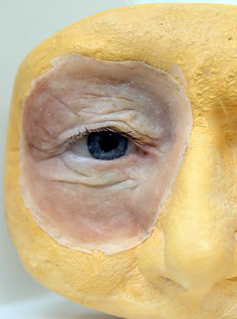
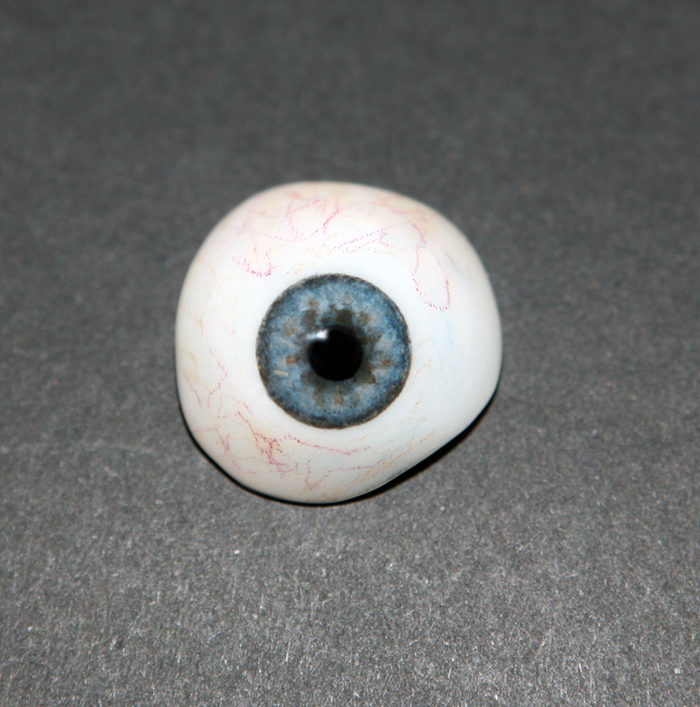
How we realize an ocular prosthesis


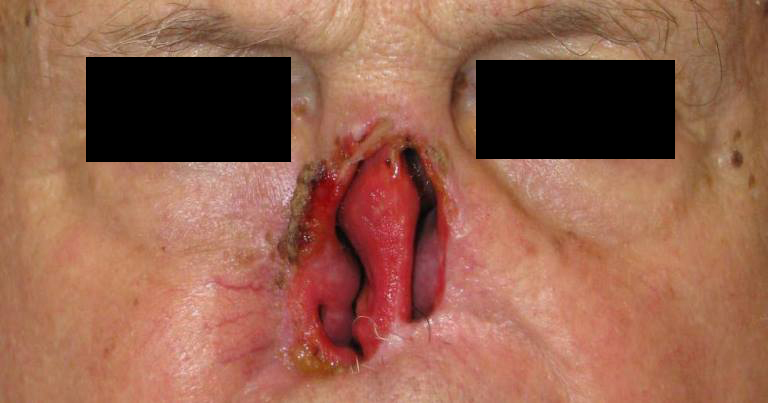
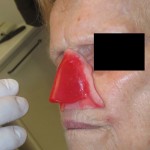
Before describing stages of an ocular prosthesis construction, we remind you that  our purpose is not only the coverage or replacement of the eye but also to improve prosthesis motility, preserving eyelid functionality and restoration of an adequate psychological condition after trauma.

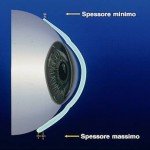
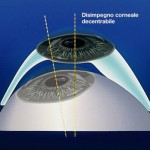
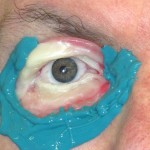
The prosthetic application is designed to achieve these results over time, counteracting the loss of tissue elasticity due to aging. Acrylic resin (PMMA) can adapt and change the prosthesis shape for several times and without limitations except those due to the injury suffered. The objectives of the prosthetic application are:


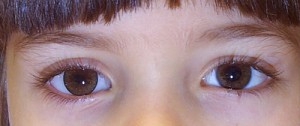
  • Maintenance of the anophthalmic socket volume
  • Reduction of the enophthalmos (upper tarsal sulcus)
  • Restoration of the excursion and eyelid movements

Wax model

After observing the anophthalmic socket dimensions we start the first phase of prosthesis construction: wax model. It is obtained by making changes to the resin base model using red wax, heated and shaped by hand to obtain the desired form.

Plaster mold

After obtaining the final shape of the model we’ve perfectly polished it in order to remove any surface irregularity and prepare the plaster liquid which will serve for the mold. Plaster is a special mixture for medical molds, without impurities and consists of millions of micro-granules with the same size to avoid the formation of air bubbles and irregularities. After flowing the plaster into the mold we carry out its vibration for a predetermined time to facilitate the escape of any air bubbles.

Mixture of white resin

After making the plaster mold that reproduces the prosthesis shape we want to achieve, we need to prepare the acrylic resin that will fill the mold: this is called “mixture“. It consists in mixing polymer powder and liquid monomer in accurate proportions. A mixing error may result in partial polymerization of the prosthesis and consequently a physico-chemical poor quality.

White form

The process for obtaining the first prosthesis of desired shape is simple but also very delicate: resin, once reached the degree of optimal hardening, is placed in the plaster mold trying to occupy every part. Then the mold is isolated and the flask closed and clamped for a precise and predetermined time and pressure.

Polymerization

Steps of follow about thermal process of polymerization consist in immersion of the system flask-mold-resin in a special pressure container filled with water which is brought to very high temperature and pressure for a predetermined time (several hours). The acrylic resin after this treatment changes its chemical characteristics losing the typical mushy consistency and assuming a hardness like glass, while maintaining high mechanical strength and break-resistant. If the polymerization is correctly carried out, the methacrylate free in atmosphere all the potentially irritating substances and becomes totally inert and biocompatible, avoiding any risk of tissue sensitization or contact allergy.

White shape finiture and pigmentation

After removing the flask from polymerisation, the white form is set free from slag processing and perfectly polished. Only when its surface is perfect it is pigmented by spreading brush of vegetable colours. We control every iris and sclera nuance on the photo centralized system that retains all the application photographs for every patient.

Completion with transparent resin and the second polymerization

Pigmented shape is dried in atmospheric air and subsequently covered with a layer of transparent methacrylate, with a procedure similar to the initial white form. The transparent resin is, therefore, carefully distributed inside the mold where it is already placed the white form and again polymerized with adjusted times and pressure in order to obtain a perfectly clear surface, free of impurities and opacity.

Finiture of prosthesis and definitive polishing

After the transparent resin polymerization prosthesis has reached its final shape and from this moment the process of finishing and final polishing begins. Finiture is obtained by polishing the surface using micro-cutters with granulometry finer and finer until obtaining a perfectly smooth surface free from imperfections. Then we carry out the polishing of the internal and external surface, edges including, that should have a smoothness and a uniform and scratch-free appearance, like glass. The presence of scratches, incisions, cuttings or other small irregularities would soon become the ideal area for accumulation of dangerous bacterial colonies for the patient health and the prosthesis tolerance.

Prosthesis Disinfection and decontamination

At the end of construction process, the artificial eye should be sterilized before being applied to the patient. We put prosthesis in a bath containing a percentage of “active oxygen” (peracetic acid), a water-soluble substance with high germicidal power, suitable for decontamination and high-level disinfection of medical and surgical devices in hospital, medical and dental field.

The product is activated by an ultrasonic agitator and perform the following functions:

1. Disinfectant with broad spectrum of action and rapid effectiveness

2. Disruptive of macromolecular protein, lipid and carbohydrate material often deposited on the surface of medical and surgical devices

3. Cleansing

After the sterilization cycle, the ocular prosthesis is ready to be applied on the patient.

Guscio base

How we realize a cosmetic shell


Before describing the birth of a cosmetic shell, we remind you that the prosthetic application purpose is not only the coverage of the eye but also shell motility, preservation of eyelid functionality and restoration of an adequate psychological condition after trauma.

If you look in front the cosmetic shell it can appear like an ocular prosthesis but if you look in profile it’s clear that it deals with a scleral-corneal contact lens: diameter is about 22 mm. The cosmetic shell is made with lathes and precision lapping machines, equipments normally used for the production of rigid contact lenses. It should be applied on an eye that although it is often blind, still possesses a certain sensitivity, an internal metabolism and their movements. In cases where the eye also presents a residue of visual functionality, the cosmetic shell can be realized with a central lens to allow the vision, as a real contact lens.

The thickness of cosmetic shell is designed compared to the eye volume. If it has a normal size the thickness can be up to a few tenths of a millimeter while in cases of serious subatrophy or severe microphthalmia, the thickness in the center of the shell can be up to a few millimeters. Acrylic resin (PMMA) can adapt and change the shell thickness and shape for several times and without limitations except those due to the injury suffered. The typical indications of this prosthetic application are:


  • Post-traumatic atrophy of the bulb
  • Corneal-scleral injury
  • Congenital microphthalmos or congenital hypoplasia (also with residual vision)
  • Microphthalmos for retinopathy of prematurity
  • Evisceration of the bulb with implant
  • Osteo-odonto-keratoprosthesis

Application is carried out with the method of “mold” contact lens and is developed in three stages:

Realisation of a clear PMMA scleral shell with a thickness inversely proportional to diameter of the bulb which is used as a “mold” for successive detections. The matrix lens is obtained from a blank of transparent methacrylate which is worked to the automatic lathe for contactology to obtain desired curvatures and polished by means of an optical lapping machine.

We control the clear shell on bulb with fluorescein examination. It is an absolutely inert and painless contrast fluid that is placed in small quantities, using a disposable strip in the lower eyelid fornix or directly on the shell, mixing with tears. Then we light it with a Wood lamp in order to highlight the lens contact areas on bulb and the lacrimal outflow routes from the corneal chamber to the outside.

After fluorescein examination we change the clear shell curvatures in order to obtain the most suitable profile for the bulb. Then we make a cosmetic shell prosthesis with the same curvatures of matrix lens but pigmented in all its parts, as a real ocular prosthesis. The tolerability and cosmetic result are almost always very satisfactory and in any case always better rather than achievable with the old method of impression or mold of the bulb.

Cosmetic shell construction

We carry out a corneal curvature in the inner surface of the shell as a protection chamber. It is designed to avoid contact with cornea and to ensure the constant lacrimal outflow. In this way we avoid suffering phenomena to the perilimbal vessels and ensure the proper corneal oxygenation. The absence of corneal contact avoids any risk of epithelium abrasion.

The anti-suction holes are tiny calibrated perforations that guarantee oxygen flow and prevent the formation of the so-called “suction effect“, which can cause corneal anoxia, bulbar conjunctiva hyperaemia and impaired tolerability.

The axial balancing is obtained with an asymmetrical distribution of the thickness and the shell weight (minimum thickness in the upper part and maximum in the lower one). In this way we obtain a “ballast effect” that ensures constant orientation of the shell in desired position.

The decentring of corneal chamber corrects the “corneal squint” which is often present in subatrophic eye and in congenital microphthalmia. The curvature translation is obtained with lathes and precision lapping machines, using diamond tools exclusively designed for our laboratory.

This safety technology avoids incidental contact between cornea and shell, which is usual during the normal movements of bulb.

Epitesi11

How we realize an epithesis


Epithesis is a facial prosthesis made of medical silicone. Its goal is the replacement of large parts of the face like orbit (eye with eyelids), auricle, external nasal pyramid or other parts of head and neck. It is constructed and applied in prosthetic rehabilitation after surgery as orbital exenteration, removal of the external nasal pyramid, the auricle or other parts of the face, or for congenital or traumatic causes.

Epithesis application improves not only the cosmetic result but also the functionality of vital activities such as breathing, mastication and phonation (often an hard palate reconstruction allows the patient to speak again). There is an important positive psychological impact for the patient who has undergone an extensive demolition of the face. This patient has always an important deficiency in the quality of daily life and the epithesis application provides a solution in this case. The materials most used today for epithesis construction are acrylic resin and medical silicone.

ORBITA (2)

Orbital exenteration

Removal of the nasal pyramid

Removal of the nasal pyramid

When is the epithesis the only choice?


  • When plastic surgery is no longer practicable
  • When the health conditions of patient are no longer fit to be subjected to surgery
  • When there is a reasonable suspicion of tumour recurrence
  • When patient has undergone radiation therapy resulting in degradation of tissues
  • When patient refuses to undergo another surgery
Removal of the auricle

Removal of the auricle

1. Impression Taking:

Impression is the mold that reproduces surgical injury you want to close. It is realized with semi-fluid medical silicone which is placed on wound and also on surrounding and contralateral areas at room temperature. it is sprinkled on the dial operative and. Once solidified, impression is used as a “mold” to obtain a plaster model for the next stage of processing. If impression includes the whole face, the patient breathing is ensured by a small tube placed inside nose or mouth

2. Wax molding of rigid base:

Once we have obtained the plaster model, we carry out an acrylic resin rigid base. Then we fit it on patient and modify it with a wax molding in order to change the shape for an indefinite number of times. In cases of Orbital Exentaration, we place the previously realized ocular prosthesis in the eyelid. Then we practice all the necessary features such as superficial wrinkles, skin folds, nevi, etc.

3. Silicone model and base pigmentation:

The final rigid resin model is placed in a mold with liquid plaster. Once solidified, it is filled with medical silicone for epitheses and inserted in a flask (metal pressure container), then placed in the polymerizer oven. After the heat polymerization we finish and pigment the silicone model. The epithesis pigmentation is performed both for resin and silicone with specific colours. Once we have obtained the desired effect, we fit again the epithesis on patient to check the absence of defects in material. In this stage we integrate silk veins in the same silicon material.

4. Surface pigmentation:

We perform this stage directly on patient because it is the realization of all the surface characteristics of the skin (moles, spots, capillaries). When pigmentation is finished, we place a layer of transparent medical silicone to protect the pigment from external agents and water. When completed, we put the eyelashes on the ocular prosthesis.

Fixtures di fissaggio

Fixing fixtures

Impianto orbitale osteointegrato

orbital osteo-integrated implant

5. Epithesis fitting on patient:

There are different ways of hooking or fixing epithesis to the surgical injury and are usually chosen based on the characteristics of internal and surrounding tissues.

Fixing systems:

  • Medical biocompatible mastic: it is the most used, the simplest, the least expensive and better accepted by patient, who can easily fit and remove the epithesis. This method is inert, doesn’t cause any infective or degenerative complication and can be fitted without any contraindication.
  • Mechanical hooking: the hooking to an eyewear used as a support was the first fixing technique used some tens of years ago. It is currently used only in the rare cases where you can’t use the medical adhesive or osteo-integrated implants.
  • Direct hooking: epithesis hooking to the surgical injury near undercuts is a mechanically functional solution but rarely practicable because it is hardly possible to have tissue structures suitable for size and mechanical qualities.
  • Fixing with osteo-integrated implants: is a surgical technique. Maxillofacial surgeon inserts titanium screw implants (fixtures), on which we will fit the epithesis with the proper hooking. Main advantage of this method is the assurance of a cosmetic satisfactory solution with a not so easy surgical technique. Contraindications are an adequate quantity and bone consistency to allow implants hooking. Also its fitting is limited only to the recovery of cosmetic deficiency and not functional. The main complications may be an implant osteointegration failure, the continuous epithesis detachment and the peri-implant infections, especially in very elderly patients, debilitated or not be able to clean wounds before and after the surgical healing.

An eye epithesis and an ear epithesis are seen at the Berlin Centre for Artificial Facial Parts (BZkG) at Charite in Berlin, Germany, 07 Ocotber 2014. Photo: Britta Pedersen/dpa

DALPASSO S.r.l. creates facial epitheses since 1958 and since then dedicates resources and invests in search for new materials and development of new polymerization techniques and fitting on patient.

DALPASSO S.r.l. always uses resources in staff training, participation in further medical training and carries out scientific studies in collaboration with leading Maxillofacial, ENT and Plastic Surgery Clinics.

Minerva Chirurgica del 1967 con uno studio del nostro fondatore Curzio Dalpasso e del prof. Francesconi sulle epitesi ricostruttive nei casi di neoplasia

Minerva Surgical 1967 with a study of our founder Curzio Dalpasso on reconstructive epitheses in cancer cases